Introduction
We strive to make ECCE setup as easy and painless as possible, with users looking at our data within 20 minutes of joining the team. This tutorial will show you how to:
- Download our singularity container
- Download VirtualBox to use our Ubuntu image
- Setup the ECCE environemnt
- Find our data stored on S3 at BNL or xRootD at JLab
- Copy this data out
Getting the container
We build an ECCE software stack daily at BNL which is stored on /cvmfs. This software stack contains 4 main repositories:
- Core Software which contains compiled code such as event generators, simulation responses, reconstruction and offline packages
- Subdetector Simulation Requirements
- Subdetector Geometry and Calibrations
- Detector and Reconstruction Macros which allow users to setup and configure their simulations and physics reconstructions
Please note that the macros repository is already setup to run our default simulation and it is unlikely that users will need to change anything here at the beginning. If you wish to change anything in the default setup, please download this repository and redirect an environment variable to these altered macros:
git clone https://github.com/ECCE-EIC/macros.git
export ROOT_INCLUDE_PATH=/path/to/macros/common:$ROOT_INCLUDE_PATH
As well as a daily build of the software stack, there are also weekly archived build called ana.x where x is updated every week and proposal builds called prop.x where x is updated before any new simulation campaign.
There are three methods to getting our environement running; the first uses VirtualBox to run our pre-build Ubuntu machine and is the recommended method to get started quickly while the latter two involve locally downloading /cvmfs and are detailed here.
You can download VirtualBox from their website. It runs well on Windows, Mac and Linux operating systems. With VirtualBox installed, download our ECCE image from this link. The MD5SUM is f6dc1258689504d6c928efc3b77a66c2. The following steps will setup the image on your machine:
- Start VirtualBox
- Clock on
ToolsthenImport
- Navigate to where the Ubuntu image downloaded to or you moved it to (do not worry about space in this folder, you will only be loading the image here, not writing to the virtual hard disk)
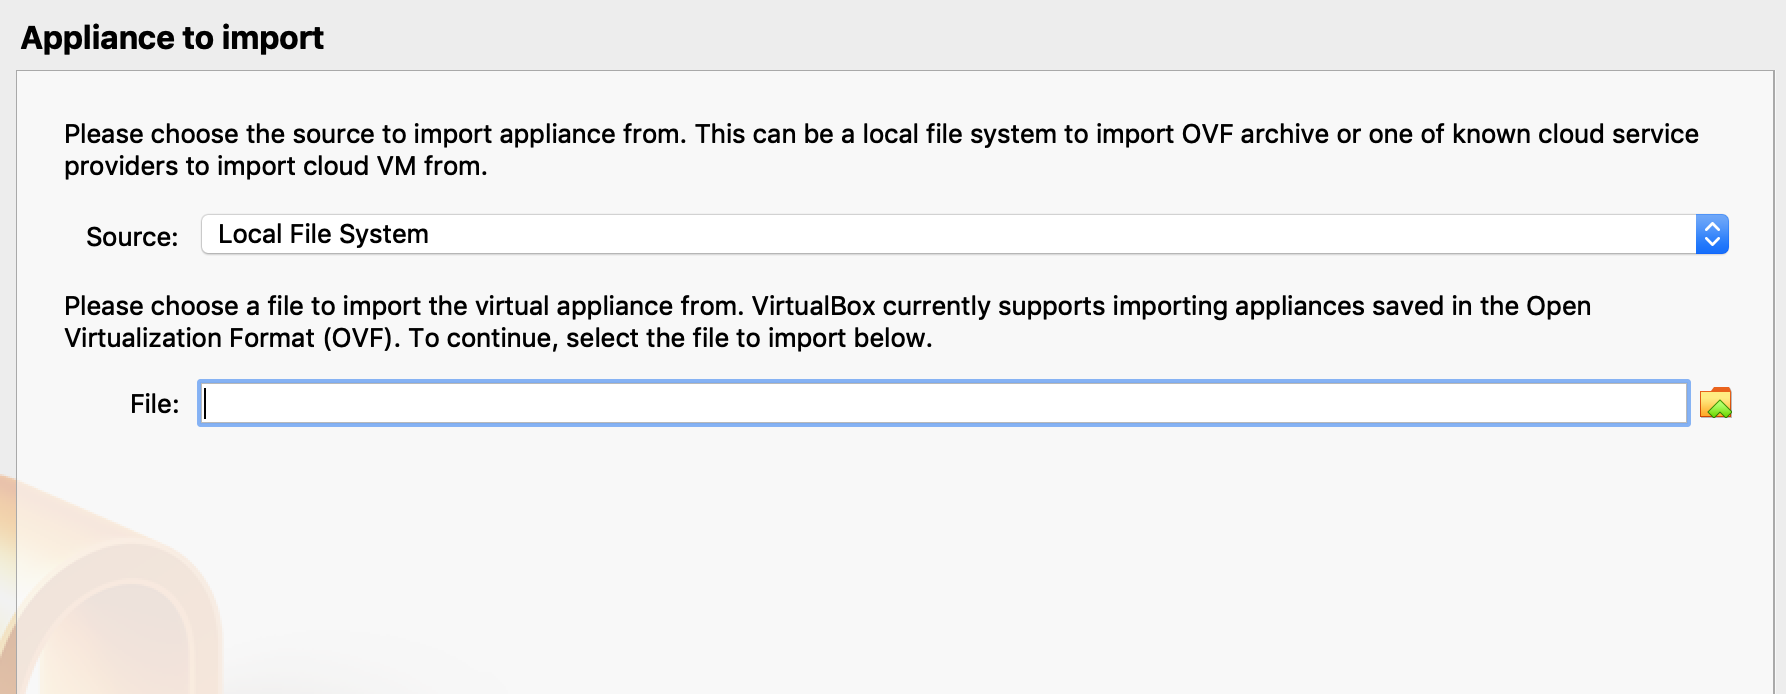
- Click next and check the settings such as RAM and Base Folder. The image defaults to 8GB of RAM, please ensure this is not 100% of our real RAM, reduce this to 4096MB if needed.
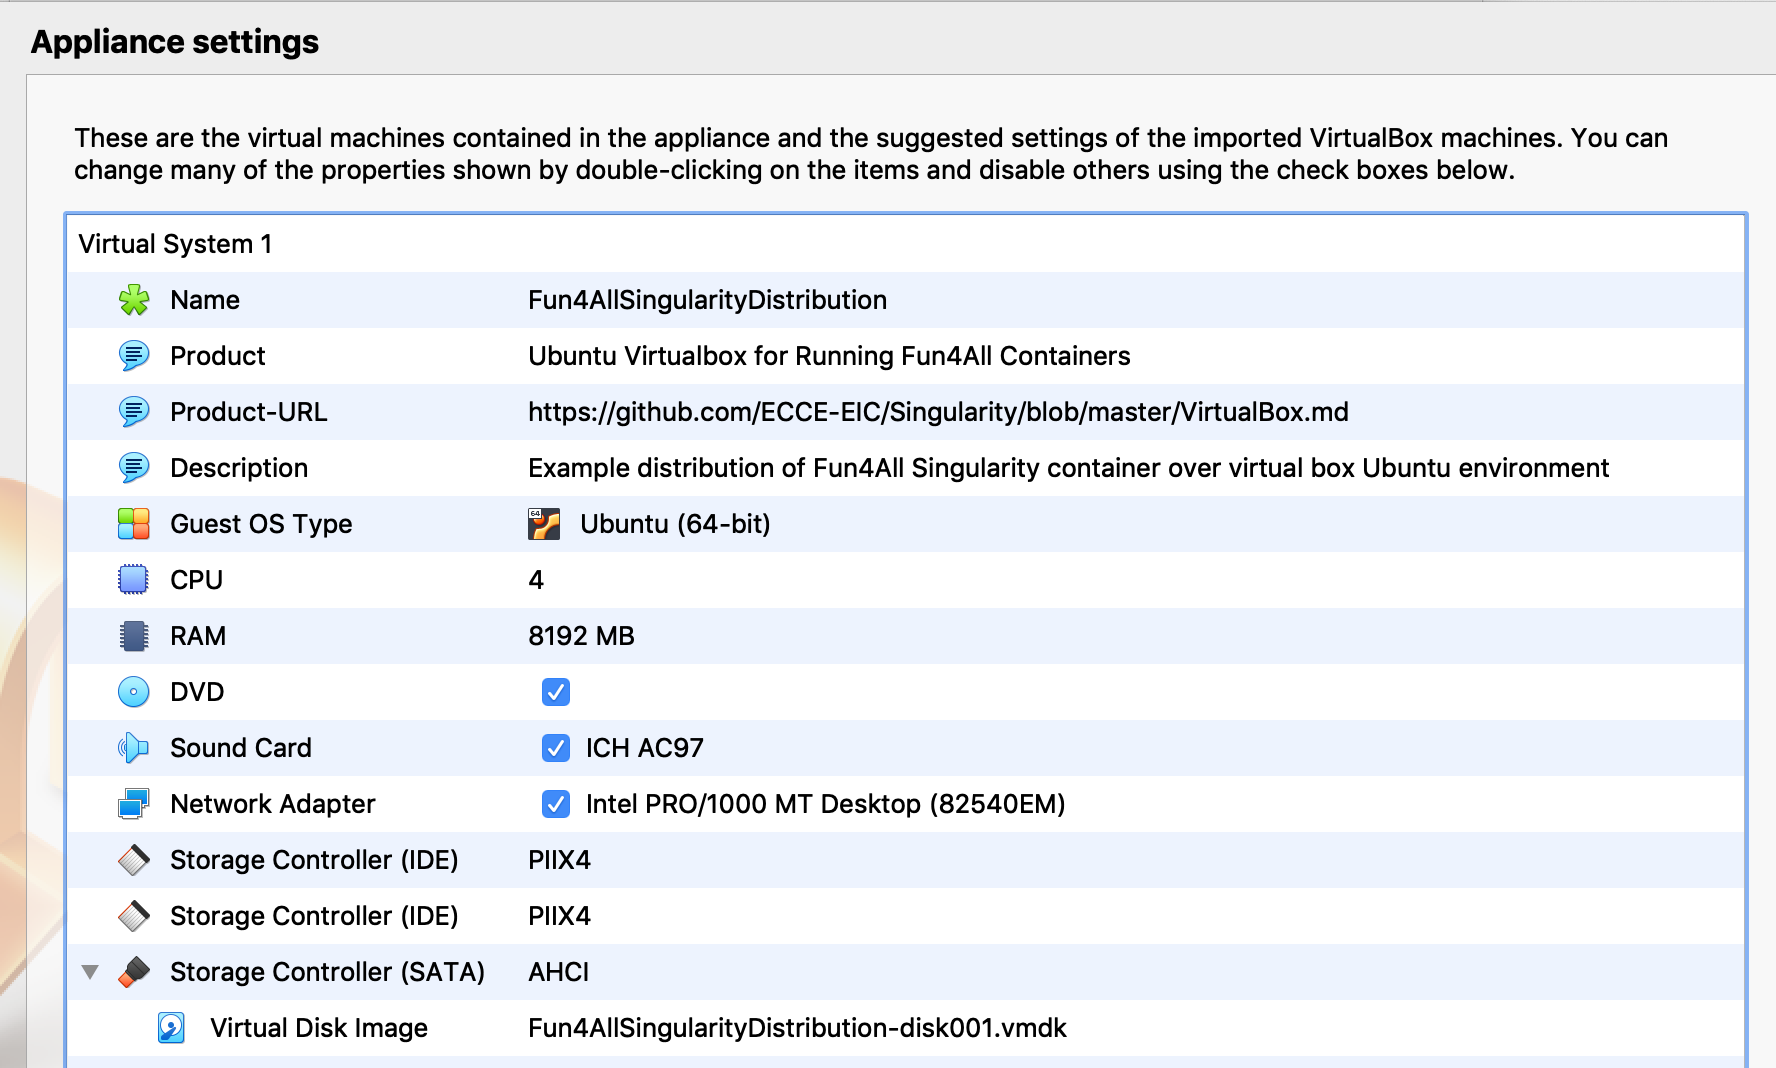
- Click
Import. The file will begin to port over the image, no OS installation is needed. - When you return to the main VirtualBox screen, click the new image,
Fun4AllSingularityDistributionby default, then clickStart
Starting the environment
Inside the virtual machine, bring up terminal to copy the startup files and enter the container. In this terminal, run the following commands:
cp  /cvmfs/eic.opensciencegrid.org/singularity/fun4all_scripts/ecce/singularity_shell.sh ~/
cp /cvmfs/eic.opensciencegrid.org/singularity/fun4all_scripts/ecce/setup.sh ~/
./singularity_shell.sh
source setup.sh
This will start the latest ECCE software stack on /cvmfs with associated read-access keys for S3 at BNL where we store data.
Finding our data
We store our data on S3 at BNL and xRootD at JLab. Both have global read-only access capability so can be accessed without an account at either BNL or JLab. They both also offer options to copy entire files locally or to open them directly with root from your home computer.
S3 at BNL
The read-access key for S3 is created the first time you source the ECCE environment. We also distribute minIO to quickly access and copy this data. This client is aliased to mcs3 and all our data is stored under eicS3/eictest/ECCE.
Check what features minIO has with
mcs3 --help
There are many commands available but some, such as creating buckets (folders), are limited to those with write-access keys.
We typically distribute two types of data:
- DSTs which contain the raw information such as hit, clusters, jets and tracks. Custom-built analysis software typically runs on these files.
- User-friendly ROOT nTuples. These are the faster data sets to work with, they tend to have branches with truth information, momentum, calorimeter deposits and more.
Files from the June 2021 concept campaign have been place on S3 under eicS3/eictest/ECCE/MC/prop.2/c131177/
As an example we will list all the files from a pythi6 simulation of electron-proton collisions at CoM energies of 10x100 GeV. The DSTs are listed with:
mcs3 ls eicS3/eictest/ECCE/MC/prop.2/c131177/SIDIS/pythia6/ep-10x100/
You will see several files starting with DST and ending with .root, these are the raw DSTs. You will also see files that have the same name as the DSTs but end in .txt, these are the associated human-readable metadata files with production information related to that DST.
When getting started, the evaluator files will be the most informative. At the end of the file list you will see folders structured as eval_x where x is a number detailing the revision of the evaluator files. Larger numbers are more recent revisions. We produce several evaluator files:
- Central Barrel EMCal
- Electron-going EMCal
- Forward EMCal
- Inside Barrel Solenoid HCal
- Outside Barrel Solenoid HCal
- Forward HCal
- Tracking
- Full Event
We can copy an Event Evaluator file from this production, it is located in eval_00001. Copy the first file to your location machine with:
mcs3 cp eicS3/eictest/ECCE/MC/prop.2/c131177/SIDIS/pythia6/ep-10x100/eval_00001/DST_SIDIS_pythia6_ep-10x100_000_0000000_05000_g4event_eval.root .
The syntax will be very familiar to anyone who has used bash where the first argument after cp is the file (or folder) to copy and the second is the location to copy to. An entire folder can be copied by setting the intial path directory and using the option --recursive. Run mcs3 cp --help to see all options.
Most root versions also have the ability to read root files from S3 storage directly. This is done via the TS3WebFile class. To use this you need to make sure the read-only access key and secret key are set in your environment. Here is how you can use this to open a file directly from root without downloading it to your local disk:
setenv S3_ACCESS_KEY eicS3read
setenv S3_SECRET_KEY eicS3read
root -l
root[0] auto f = new TS3WebFile("s3://dtn01.sdcc.bnl.gov:9000/eictest/ECCE/MC/prop.2/c131177/SIDIS/pythia6/ep-10x100/eval_00001/DST_SIDIS_pythia6_ep-10x100_000_0000000_05000_g4event_eval.root");
xrootd at JLab
The xrootd library allows you to access an xrootd server from any program. This is done on Linux systems by setting the LD_PRELOAD environment variable to point to the library:
export LD_PRELOAD=/usr/lib64/libXrdPosixPreload.so
ls root://sci-xrootd.jlab.org//osgpool/eic/ECCE/MC/prop.2/c131177/Electroweak/Djangoh/ep-10x100nc-q2-10
Or, if you don’t have xrootd installed at the system level, you can try using the one that may be installed with your root:
export LD_PRELOAD=$ROOTSYS/lib/libXrdPosixPreload.so
ls root://sci-xrootd.jlab.org//osgpool/eic/ECCE/MC/prop.2/c131177/Electroweak/Djangoh/ep-10x100nc-q2-10
This allows you to use that standard commands like ‘ls’ and ‘cp’ to browse directories and copy files to your local directory. You may also open a file directly from root without downloading it using something like this:
root -l root://sci-xrootd.jlab.org//osgpool/eic/ECCE/MC/prop.2/c131177/Electroweak/Djangoh/ep-10x100nc-q2-10/eval_00000/DST_Electroweak_Djangoh_ep-10x100nc-q2-10_000_0663000_01000_g4fhcal_eval.root
root file structure
You now have a file containing information on 5000 ep collisions. Load this file into root with
root DST_SIDIS_pythia6_ep-10x100_000_0000000_05000_g4event_eval.root
list the branches available with
event_tree->Print()
or see what is in the first event with
event_tree->Show(0)
or visualise the particles in the simualtion with
event_tree->Draw("mcpart_PDG")